It’s been over a month since my last update, but I’ve made a lot of progress on making these spinners fully functional.
So far, I have two iterations of the spinner with ceramic bearings in the center. I use glue and clamps to put the spinner layers together. One design has two 1/8″ layers, for 1/4″ total thickness, and the other has a 1/16″ layer sandwiched between two 1/8″ layers. Both function about the same.
I’m now optimizing the cap design. I’ve used tinkercad to work on the designs using the 3D printer. Once I have a cap that can stay in place in the center of the bearing yet also be removed easily, I will start figuring out how to make the spinners more aesthetically pleasing by painting the wood, etching it using the laser cutter, and perhaps even trying to do the LED light thing Mr. D showed me a while back.
Mr. DiGiorgio sent me a link to this cool post on instructables. Adding LED lights could be a cool way to take this project further once I have my design down solid.
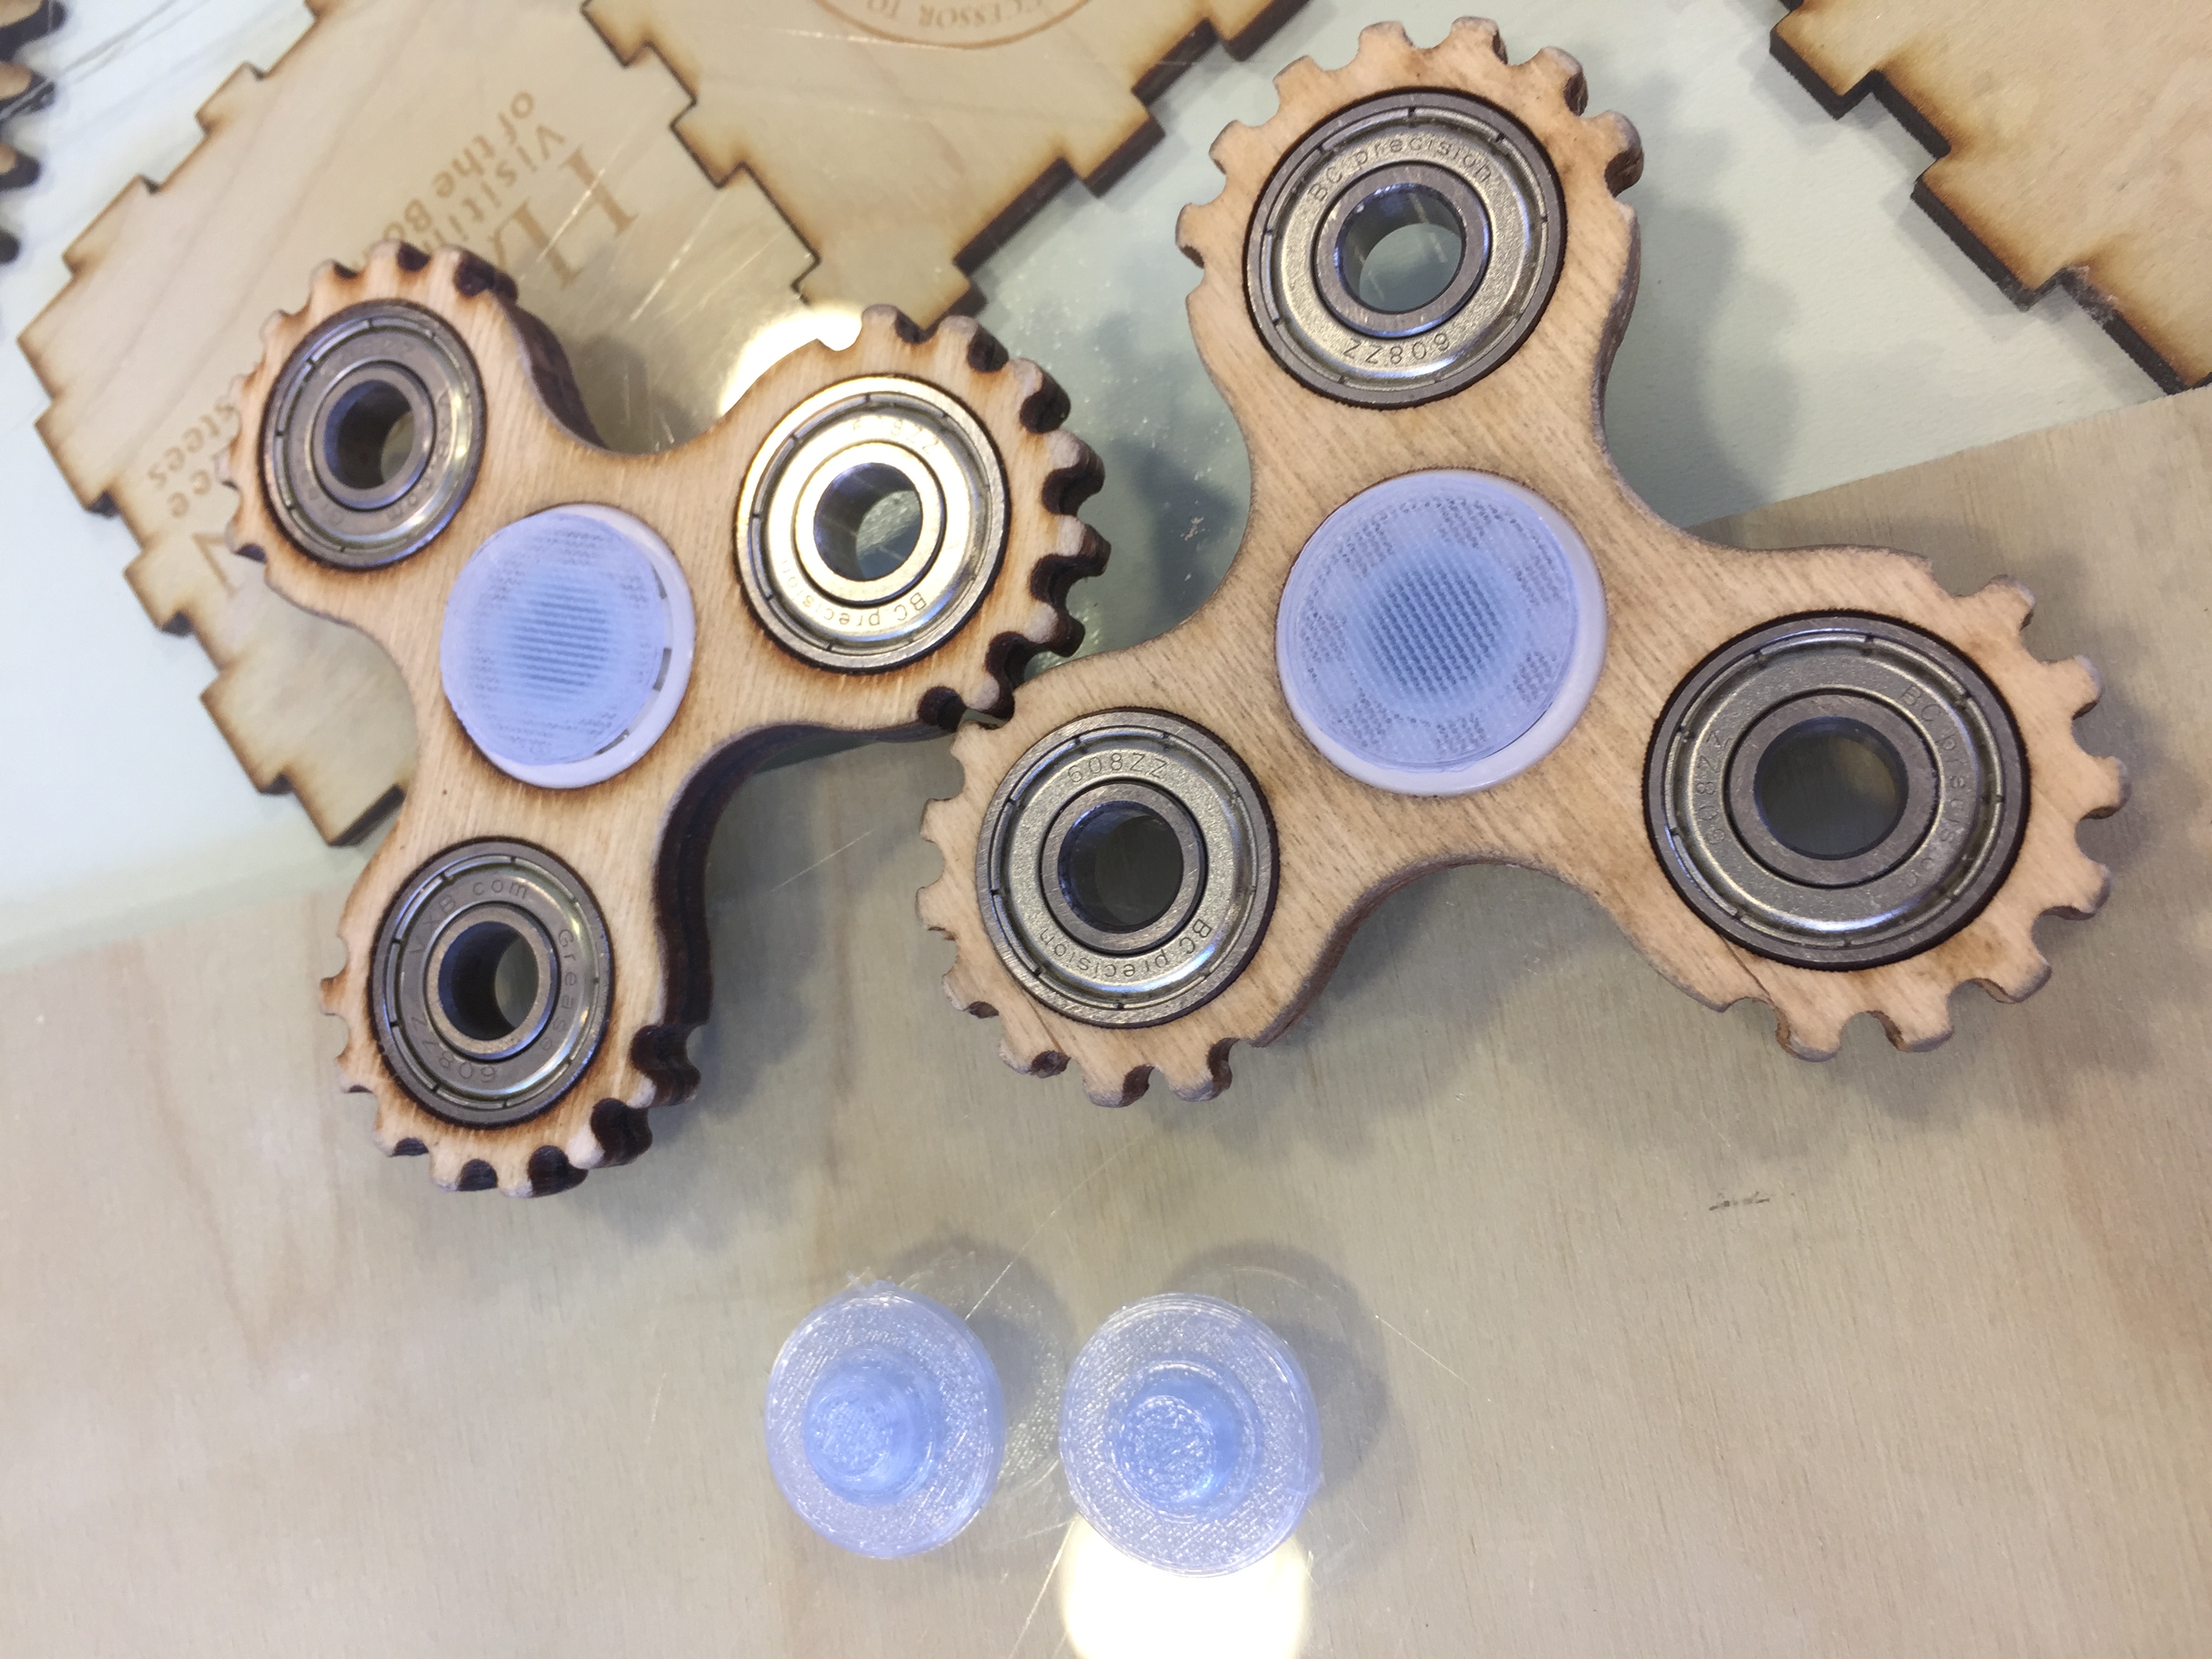
I’m still working on my cap design while other people use the laser cutter. I’ve printed 2 new caps on the 3D printer. These ones are flat on the finger side so that they’re smooth and take advantage of the heated plate.
I’m currently working on 3D printing some caps for my spinner. I made the design so that it’s ergonomic and easy to place into the bearing so that one does not have to hold the center of the bearing itself but rather has a fingerprint-sized cap to hold. I might make it so that it stays in place using glue or not using glue so they can be removed. A current problem with the blue caps pictured below is the fact that they’re not smoothly printed on the part where the finger holds it, so I might get rid of the lip and just make it so that the part where the finger holds it is printed on the bottom of the 3D printer’s plate so that the heat smooths it out.
I’m continuing my work on the laser cutter with more iterations of the spinner design. So far, the round spokes pictured below are my favorite.
I need to order more ceramic bearings in order to produce more long-spinning spinners.
Once I have a solid design for the spinner, a way to consistently make the wood spinner not wobble, and a good cap design, I’m hoping to produce some of these and sell them to friends and acquaintances. The wobble comes from inexact placement of the bearings within the mold, so making the process as exact and precise as possible will be necessary to be able to make these wood spinners high quality.

My wood fidget spinner design is complete. I spent the last few days working in Corel to fine tune the design. Making the design was a learning process, and adjusting nodes and learning other tools in Corel made this design possible. I replicated the design I initially had with the 3D printer, and then added grooves on the outside to make it easier to spin. I then spent a couple of days learning how to use the laser cutter to apply my design to wood. Learning the laser cutter is an ongoing process, and I’ve gone through many different prototypes to precisely size the holes for the bearings. Today, I’ve been able to use it successfully enough to finally make my first functioning prototype wood fidget spinner. After many iterations, I made two cuts, one on 1/4″ wood and one on 1/8″ wood, and glued them together. I put glue clamps on, let it dry, and then put the bearings in. It’s a little wobbly and it took some sanding to fit the center ceramic bearing in, but it works. Now I want to adjust my design by lessening some of the grooving on the outside and reducing the size of the “wings” on each arm, perhaps even eliminating them altogether. I also want to make the outside a bit thicker because sometimes my prototypes broke. In addition, I’m going to make a good cap for the ceramic middle spinner so that worrying about touching the spinning part and imparting friction/slowing down the spin is nonexistent, as well as reducing the “pain” or nuisance one gets from pressing down on the hole too hard with a finger, causing a circular indentation. 
|
Mr. D recommended I switch my design to the laser woodcutter so that I can more quickly and precisely adjust my design. So, I have lost some progress that I made with Tinkercad since I now need to reproduce it in Corel, however, my initial prototypes are looking solid. I have the same basic idea for the shape of the spinner, I just need to optimize it, put the bearings in, and reproduce it.
I have a few more steps to take to perfect my fidget spinner. I first need to improve the cap design so that it fits more neatly within the spinner design, and create a few copies once I have improved it. I think I want to decrease the distance between the cap itself and the connector pieces, and make the connector pieces fit more snugly while also being able to be removed easily. I also want to make the cap slightly concave so that it is more ergonomic, perhaps adding grooves for grip.
For the spinner design, I am working on it but my goal is to add grooves on the outside for better grip when spinning, and perhaps add an ability to spin it on the finger as well.
Finally, once I receive the ceramic bearing, my spinner will be able to spin much longer because it will have much less friction than the regular steel bearings. These steps should make my design better and hopefully make for a neat toy in the end.
My inspiration for improvements in my spinner and cap designs:
Today I finished a design for the middle bearing cap on my fidget spinner.
It’s currently printing but I hope to see it on my design by the end of class today.
I think my current goal with this project has shifted from making multiple fidget toys into a conglomeration and more focus on one type, the spinner. This way, I can optimize the design and make the coolest, best possible spinner.
I used 8x22x7(mm) VXB shielded bearings (model 608ZZ) placed in 22mm diameter holes on this 4-hole shape. I sanded the insides of the holes, used a “soft hammer” to knock them into place, and now it spins for a solid 10 seconds.
Using Tinkercad, I plan on making a cap for the center bearing. The inside diameter is 8mm, the outside 22mm, and the thickness is 7mm.
Today I also completed all of the Tinkercad lessons.
Other Fidget Toys Ideas
Magnet Entertainment: This could be developed to something as simple as a magnetic plate and a small ball bearing.
http://fidgetland.com/: Another simple toy that could be adapted to a multi-functional system.
Another idea I came across was to use coins as weights, rather than other bearings.
Implementing the idea I had to use something to spin around a finger, similar to a key on a lanyard, would be to use holes in the center of the outside rings of the spinner and be able to stick your finger inside and flip the whole device from there, like in this video: https://www.instagram.com/p/BN54riGlcsY/

I’ve been thinking about what individual functions I can implement into my “conglomeration” of fidget toys into one toy. I came across some cool fidget spinners from https://addictivefidgettoys.com/#shop. They work with bearings that rotate around an axis and have symmetry, allowing for up to 6 or more individual arms. I want to use the idea of the Fidget Cube and make a toy that combines different functions that allow you to fidget by spinning, clicking, flipping, and rolling. I’ve also been thinking about common ways I fidget normally, such as spinning my phone on its back, flipping pencils, clicking pens, tapping my fingers, spinning my keys on their lanyard, and more. My end goal is to make a system in which I can attach and detach different fidget toys and use them one at a time, as opposed to the pocketable Fidget Cube which requires lots of small parts and is not easily replicated.
Other functions I am considering include rolling marbles, a stress ball feature, and a pen click feature.
|
|
|
|
|
|


2 Replies to “Wood Fidget Spinner Project”
Comments are closed.